PowerShell Universal Dashboard and AWS Elastic Beanstalk
PowerShell Universal Dashboard and AWS Elastic Beanstalk
PowerShell UD is a powerful PowerShell frontend framework and I highly recommend you to try it out. I played with PowerShell Universal Dashboard (UD) when it was released in beta by Adam Driscoll. At that time I hosted a dashboard on Raspberry Pi to show some sensor data. I really like UD as it enables PowerShell developer to create a beautiful, interactive and usable webpage with just a few lines of PowerShell code.
Fast forward. A few days ago while showering, I was wondering how would one run UD using AWS, and most importantly without managing the server. (Shower is one of the best activities to inspire innovation, btw. 😎) I won't bore you with the attempts I tried. In the end, I decided to use AWS Elastic Beanstalk (Beanstalk) and it worked nicely. In this post, I will share with you about how to run PowerShell Universal Dashboard (UD) with AWS Elastic Beanstalk (Beanstalk). Beanstalk is an orchestration service for deploying web applications including .NET/ IIS based ones. Beanstalk has rich load balancing, blue-green deployment and auto-scaling capabilities and you can look into those when scaling your application.
As UD can run as an IIS web application., it is fairly straight forward to a) make the deployment bundle and then b) deploy the bundle to Beanstalk.
a: Create the Beanstalk Deployment Package
TL;DR
- Create Beanstalk Deployment Manifest (
aws-windows-deployment-manifest.json). The manifest tells how you want Beanstalk to deploy the application. Manifest doc
- IIS application (
psud.zip). This file will contain the downloaded Universal Dashboard Community module files at the folder root. Your dashboard.ps1should be here.
- The two files are again zipped together as the final artifact:
mypsud.zip. We will later upload the mypsud.zip to Beanstalk.
aws-windows-deployment-manifest.json). The manifest tells how you want Beanstalk to deploy the application. Manifest docpsud.zip). This file will contain the downloaded Universal Dashboard Community module files at the folder root. Your dashboard.ps1should be here.mypsud.zip. We will later upload the mypsud.zip to Beanstalk.Details
i. Deployment Manifest
As for the Deployment Manifest, you can use the following as an example or reference the manifest doc. I changed the appBundle property to point to the psud.zip. I then save this as aws-windows-deployment-manifest.json in my computer's c:\temp\src folder to help me organize.
{
    "manifestVersion": 1,
    "deployments": {
        "aspNetCoreWeb": [
        {
            "name": "mypsud",
            "parameters": {
                "appBundle": "psud.zip",
                "iisPath": "/",
                "iisWebSite": "Default Web Site"
            }
        }
        ]
    }
}
appBundle property to point to the psud.zip. I then save this as aws-windows-deployment-manifest.json in my computer's c:\temp\src folder to help me organize.{
"manifestVersion": 1,
"deployments": {
"aspNetCoreWeb": [
{
"name": "mypsud",
"parameters": {
"appBundle": "psud.zip",
"iisPath": "/",
"iisWebSite": "Default Web Site"
}
}
]
}
}
ii. IIS Application (UD)
I saved the UD community module to my local computer's c:\temp directory.
Save-Module UniversalDashboard.Community -path c:\temp -AcceptLicense
Hint: You might need to update your PowerShellGet module version and then restart your PowerShell console.
Install-Module powershellget -Force
The version is 2.4.1 at the time of writing.
I then update the C:\temp\UniversalDashboard.Community\2.4.1\dashboard.ps1 to what I want. When the version changes, yours will be in a different module version path.
c:\temp directory.Save-Module UniversalDashboard.Community -path c:\temp -AcceptLicense
Hint: You might need to update your PowerShellGet module version and then restart your PowerShell console.Install-Module powershellget -Force
2.4.1 at the time of writing.C:\temp\UniversalDashboard.Community\2.4.1\dashboard.ps1 to what I want. When the version changes, yours will be in a different module version path.dashboard.ps1
Here is my test dashboard code. Note, you will need to add the
-Wait switch to the Start-UDDashboard function for the IIS deployment.
Start-UDDashboard -Wait -Dashboard (
  New-UDDashboard -Title "This is a test" -Content {
    New-UDCard -Title "Hello, test test"
  }
)
Start-UDDashboard -Wait -Dashboard (
New-UDDashboard -Title "This is a test" -Content {
New-UDCard -Title "Hello, test test"
}
)
iii. Deployment Package
I then use the following PowerShell commands to package things up correctly. The folder structure is VERY important and using Windows Explorer can sometimes create an additional layer of folder in the zip file.
$ProgressPreference = 'SilentlyContinue' # turning the progrss bar speeds up the process
Compress-Archive -Path 'C:\temp\UniversalDashboard.Community\2.4.1\*' -DestinationPath 'C:\temp\src\psud.zip'
Compress-Archive -Path 'C:\temp\src\*' -DestinationPath 'C:\temp\artifact\mypsud.zip'
Sweet!!!! we now have the deployment package: mypsud.zip! Moving on to the next step.
$ProgressPreference = 'SilentlyContinue' # turning the progrss bar speeds up the process
Compress-Archive -Path 'C:\temp\UniversalDashboard.Community\2.4.1\*' -DestinationPath 'C:\temp\src\psud.zip'
Compress-Archive -Path 'C:\temp\src\*' -DestinationPath 'C:\temp\artifact\mypsud.zip'
mypsud.zip! Moving on to the next step.b. Create the Beanstalk/ Universal Dashboard App
Let's create our Beanstalk/ Universal Dashboard app now. I assume you already have an AWS account. If you would like to create one, follow the steps in this article. I use my personal AWS account and the us-east-1 region in the following steps:
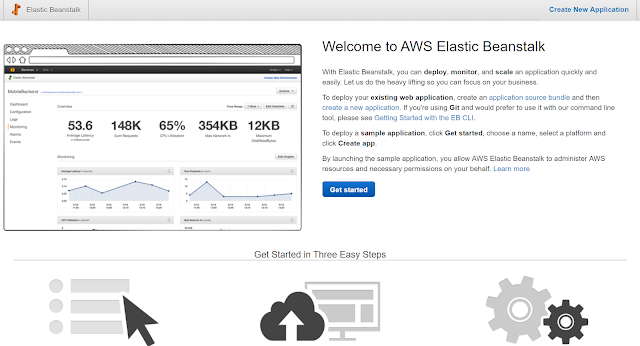
- Log into the AWS account and open the Elastic Beanstalk console. Click on the "Get started" button.
- In the
Create a web app page, I enter the application name, select .NET (Windows IIS) as the platform. while I have the code I select the Sample applications, to begin with. Then I choose Configure more options.
- In the additional options, I find the "Instances" card and click on "Modify".

- I changed Instance type to
t2.micro to use the free tier instance hours included in my AWS account (for the first year only). I don't need additional space so I picked the default and click on "Save" and then create the environment.
- The environment creation takes a few minutes. And I can see my website/ dashboard's URL here as well.

- Once deployment completed, I see this page with the green healthy checkmark. Now it the time to upload our dashboard code. I click on "Upload and Deploy"

- I choose the
mypsud.zip created in previous steps.
- Beanstalk automatically updates the IIS for me without me managing the instances/ IIS site.

- And once deployed, I can navigate to the URL and voila! The dashboard is up and running! (In the test here I use HTTP only, please use HTTPS if you are going to host any formal workload)

- To change the dashboard, I can update the
dashboard.ps1, re-compress the zips, and then simply upload the zip to Beanstalk.

- When I am done with the exploration, I terminate the environment so I don't exceed my free tier limit.


That's it! You now know how to create the bundle for deploying PowerShell UD in AWS Elastic Beanstalk! PowerShell UD is a powerful framework and I highly recommend you to try it out. You can run it locally on your computer to begin with. 👍👍👍

Create a web app page, I enter the application name, select .NET (Windows IIS) as the platform. while I have the code I select the Sample applications, to begin with. Then I choose Configure more options.

t2.micro to use the free tier instance hours included in my AWS account (for the first year only). I don't need additional space so I picked the default and click on "Save" and then create the environment.


mypsud.zip created in previous steps.


dashboard.ps1, re-compress the zips, and then simply upload the zip to Beanstalk.


That's it! You now know how to create the bundle for deploying PowerShell UD in AWS Elastic Beanstalk! PowerShell UD is a powerful framework and I highly recommend you to try it out. You can run it locally on your computer to begin with. 👍👍👍
I had trouble getting the 2.9.0 version of universal dashboard working with this. When I switched to 2.1.0 it worked for me.
ReplyDelete